#Go Face Recognition Tutorial - Part 1

The whole area of Face Recognition is something I love reading about. Implementing a facial recognition system yourself makes you sound like you are Tony Stark and you can use them for a variety of different projects such as an automatic lock on your door, or building a surveillance system for your office to name but a few.
In this tutorial, we are going to be building our own, really simple face recognition based system in Go using a few existing libraries. We’ll start by doing simple face recognition on still images and seeing how that works and we’ll then be expanding upon this to look into real-time face recognition on video feeds in part 2 of this mini-series.
Video Tutorial
This tutorial is available in video format, should you wish to support me and my channel then please like and subscribe to my channel! For more on working with files and data in Go, check out our file handling guide.
The Kagami/go-face package
For the basis of this tutorial, we’ll be using the kagami/go-face package which wraps around the dlib machine learning toolkit!
Note - Kagami actually wrote about how he went about writing this package. It’s definitely an interesting read and you can find it here: https://hackernoon.com/face-recognition-with-go-676a555b8a7e
The dlib toolkit
The Dlib toolkit is built in C++ and is incredible at both face and object recognition/detection. According to its documentation, it scores around 99.4% accuracy on detecting labeled faces in the Wild benchmark which is incredible and it’s the reason why so many other third-party libraries utilize it as their base.
Note - I’ve covered the Dlib toolkit’s Python library - face_recognition in a previous tutorial. If you want to check out the python equivalent of this tutorial, here it is: An introduction to Face Recognition in Python
Setup
I’m not going to lie, getting this up and running is slightly more painful than
your standard Go package. You’ll need to install both pkg-config and dlib on
your machine. If you are running on MacOS then this is the command:
$ brew install pkg-config dlib
$ sed -i '' 's/^Libs: .*/& -lblas -llapack/' /usr/local/lib/pkgconfig/dlib-1.pc
Getting Started
We’ll first of all need to download the kagami/go-face package which can be
done with the following go get command:
$ go get -u github.com/Kagami/go-face
Create a new directory called go-face-recognition in your GOPATH directory.
Within this directory create a new file called main.go, this is where all of
our source code is going to reside.
Once you’ve done this, you will need to grab the files from the image/
directory in the
TutorialEdge/go-face-recognition-tutorial
repo. The easiest way to do this is to clone the repo into another directory and
just copy the image directory into your current working directory:
$ git clone https://github.com/TutorialEdge/go-face-recognition-tutorial.git
Once that has been successfully cloned, we have both the .dat files that we
need in order to kick off our face recognition program. You should also see a
list of other .jpg files which contain the faces of some of the Marvel
Avengers.
package main

import (
    "fmt"

    "github.com/Kagami/go-face"
)

const dataDir = "testdata"

func main() {
    fmt.Println("Facial Recognition System v0.01")

    rec, err := face.NewRecognizer(dataDir)
    if err != nil {
        log.Fatalf("Cannot initialize recognizer: %v", err)
    }
    defer rec.Close()

    fmt.Println("Recognizer Initialized")
}
Ok, so if we try and run our program at this point, we should see both
Facial Recognition System v0.01 and Recognizer Initialized in our program’s
output. We’ve successfully set everything we need up in order to do some cool
advanced facial recognition!
Counting Faces in a Picture
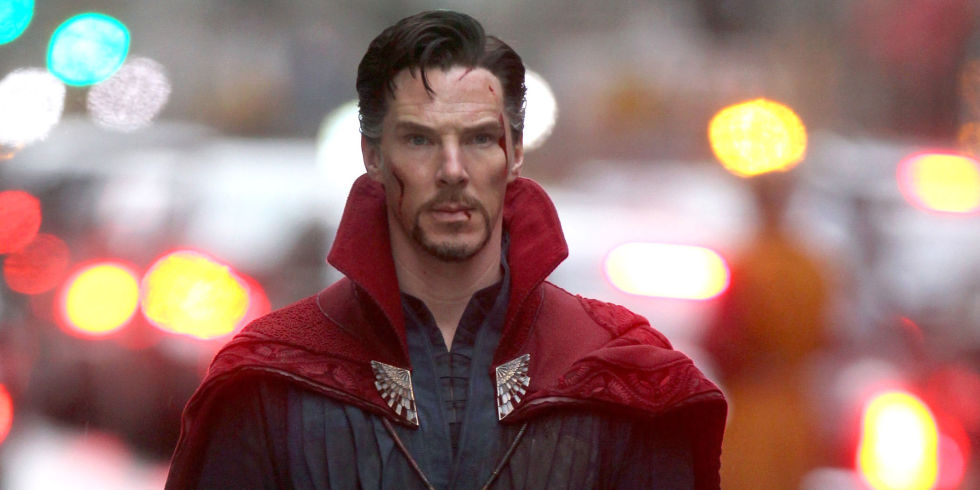
Our first real test of this package will be to test to see whether we can accurately count the number of faces in a photograph. For the purpose of this tutorial, I will be using this photo:

As you can see, nothing fancy, just the solitary face of Tony Stark.
So, we now need to extend our existing program to be able to analyze this image and then count the number of faces within said image:
package main

import (
    "fmt"
    "log"
    "path/filepath"

    "github.com/Kagami/go-face"
)

const dataDir = "testdata"

func main() {
    fmt.Println("Facial Recognition System v0.01")

    rec, err := face.NewRecognizer(dataDir)
    if err != nil {
        fmt.Println("Cannot initialize recognizer")
    }
    defer rec.Close()

    fmt.Println("Recognizer Initialized")

    // we create the path to our image with filepath.Join
    avengersImage := filepath.Join(dataDir, "tony-stark.jpg")

    // we then call RecognizeFile passing in the path
    // to our file to retrieve the number of faces and any
    // potential errors
    faces, err := rec.RecognizeFile(avengersImage)
    if err != nil {
        log.Fatalf("Can't recognize: %v", err)
    }
    // we print out the number of faces in our image
    fmt.Println("Number of Faces in Image: ", len(faces))

}
When we run this, we should see the following output:
$ go run main.go
Facial Recognition System v0.01
Recognizer Initialized
Number of Faces in Image:  1
Awesome, we’ve been able to analyze an image and determine that the image contains the face of one person. Let’s try a more complex image with more of the Avengers in it:

When we update line 24:
avengersImage := filepath.Join(dataDir, "avengers-01.jpg")
And re-run our program, you should see that our program is able to determine that 2 people are in this new image.
Recognizing Faces:
Sweet, so we’re able to calculate the number of faces in an image, now what about actually determining who those people are?
To do this, we’ll need a number of reference photos. For example, if we wanted to be able to recognize Tony Stark out of a photo, we would need example photos tagged with his name. The recognition software would then be able to analyze photos for faces with his likeness and match them together.
So, let’s take our avengers-02.jpg as our reference image for Tony Stark and
then see if we can identify if this image contains his face:
avengersImage := filepath.Join(dataDir, "avengers-02.jpeg")

faces, err := rec.RecognizeFile(avengersImage)
if err != nil {
    log.Fatalf("Can't recognize: %v", err)
}
fmt.Println("Number of Faces in Image: ", len(faces))

var samples []face.Descriptor
var avengers []int32
for i, f := range faces {
    samples = append(samples, f.Descriptor)
    // Each face is unique on that image so goes to its own category.
    avengers = append(avengers, int32(i))
}
// Name the categories, i.e. people on the image.
labels := []string{
    "Dr Strange",
    "Tony Stark",
    "Bruce Banner",
    "Wong",
}
// Pass samples to the recognizer.
rec.SetSamples(samples, avengers)
So, in the above code, we’ve gone through all of the faces in order from left to right and labeled them with their appropriate names. Our recognition system can then use these reference samples to try and perform its own facial recognition on subsequent files.
Let’s try testing out our recognition system with our existing image of Tony
Stark and seeing if it’s able to recognize this based of the face descriptor it
generated from the avengers-02.jpeg file:
// Now let's try to classify some not yet known image.
testTonyStark := filepath.Join(dataDir, "tony-stark.jpg")
tonyStark, err := rec.RecognizeSingleFile(testTonyStark)
if err != nil {
    log.Fatalf("Can't recognize: %v", err)
}
if tonyStark == nil {
    log.Fatalf("Not a single face on the image")
}
avengerID := rec.Classify(tonyStark.Descriptor)
if avengerID < 0 {
    log.Fatalf("Can't classify")
}

fmt.Println(avengerID)
fmt.Println(labels[avengerID])
Let’s now try to validate that this wasn’t a fluke and try to see if our image recognition system works with an image of Dr Strange.
testDrStrange := filepath.Join(dataDir, "dr-strange.jpg")
drStrange, err := rec.RecognizeSingleFile(testDrStrange)
if err != nil {
    log.Fatalf("Can't recognize: %v", err)
}
if drStrange == nil {
    log.Fatalf("Not a single face on the image")
}
avengerID = rec.Classify(drStrange.Descriptor)
if avengerID < 0 {
    log.Fatalf("Can't classify")
}
And finally, let’s try this out using Wong’s image:

testWong := filepath.Join(dataDir, "wong.jpg")
wong, err := rec.RecognizeSingleFile(testWong)
if err != nil {
    log.Fatalf("Can't recognize: %v", err)
}
if wong == nil {
    log.Fatalf("Not a single face on the image")
}
avengerID = rec.Classify(wong.Descriptor)
if avengerID < 0 {
    log.Fatalf("Can't classify")
}
fmt.Println(avengerID)
fmt.Println(labels[avengerID])
When you run this all together, you should see the following output:
$ go run main.go
Facial Recognition System v0.01
Recognizer Initialized
Number of Faces in Image:  4
1
Tony Stark
0
Dr Strange
3
Wong
Awesome, we’ve managed to build up a really simple face recognition system that allows us to identify the various different Avengers.
Challenge: Build up a number of reference files on all of the Avengers and try to extract out the face recognition code snippets into a reusable function
Complete Source Code:
The complete source code for this tutorial can be found in Github: Tutorialedge/go-face-recognition-tutorial
Conclusion
In this tutorial, we successfully managed to build a really simple face recognition system that works on still images. This will hopefully form the basis of the next part of this tutorial series, in which we look at how to do this in a real-time context on a video stream.
Hopefully you enjoyed this tutorial, if you did then please let me know in the comments section down below!
Note - If you want to keep track of when new Go articles are posted to the site, then please feel free to follow me on twitter for all the latest news: @Elliot_F.
Share this article
Continue Learning
Go Encryption and Decryption using AES - Tutorial
In this tutorial, we are going to look at how you can do both encryption and decryption using AES in Go
Writing a Frontend Web Framework with WebAssembly And Go
In this tutorial, we are going to look at building a really simple frontend web framework using WebAssembly and Go
Building a Solid Continuous Integration Pipeline with TravisCI for Your Go Projects
In this tutorial, we look at how you can build a solid CI pipeline with Travis for your Go Projects
Go Unsafe Package Tutorial
In this tutorial, we are going to be taking an in-depth look at the unsafe package in Go and how you can use it for low-level memory operations.